Disclosure: As a reader-supported blog, some of the links in our posts are affiliate links, and if you go through them to make a purchase we may earn a commission. This doesn’t cost you anything extra, but it does help us keep the site up and running with quality content. Thank you for your support!
DigitalOcean is a popular cloud infrastructure provider known for its simplicity and cost-effectiveness. If you’re a beginner or a blogger looking to host your WordPress website on DigitalOcean servers, you’re in the right place. This step-by-step guide will walk you through the process, ensuring a smooth and successful deployment for your blogging and creative projects.
Table of Contents
Step 1: Create a DigitalOcean Account
Before getting started, head over to the DigitalOcean website and sign up for an account. DigitalOcean’s user-friendly interface makes it a great choice for beginners and bloggers who want to focus on their content without worrying about complicated server configurations. Besides, using the affiliate link you’ll get $200 in credit over 60 days at no additional cost to you.

Step 2: Launch a Droplet
A “Droplet” is a virtual private server (VPS) on DigitalOcean. To launch a WordPress-ready Droplet that suits your blogging needs, follow these steps:
- Log in to your DigitalOcean account.
- Click on the “Create” button and choose “Droplets” from the dropdown menu.
- Select the data center region closest to your target audience to ensure better website performance and accessibility.
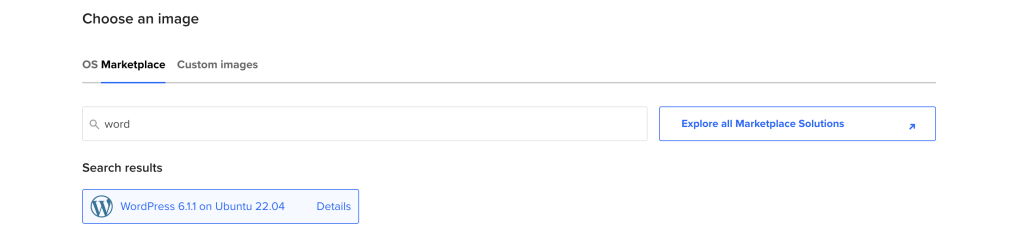
- Under “Choose an image,” select “Marketplace” and then search for “WordPress”. This one-click setup saves time and effort, allowing you to focus on writing and creating content.
- Choose a plan that fits your budget and blogging requirements. DigitalOcean offers various options to cater to your specific needs.
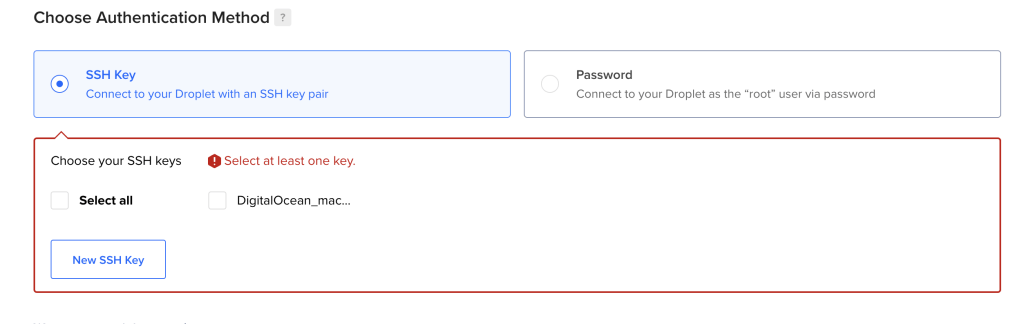
- Choose Authentication Method. The recommended method would be SSH key. Click “New SSH Key” button and paste your key or follow the instructions on how to generate one.
Step 3: Set Up a Domain Name
After creating the Droplet, you need to register your custom domain name to complete the WordPress installation process. To make your blog accessible with a custom domain name, configure the DNS settings:
- Go to your domain registrar’s website (e.g., GoDaddy, Namecheap) and log in.
- Create an “A” record that points to your Droplet’s IP address.
Step 4: Access Your Droplet
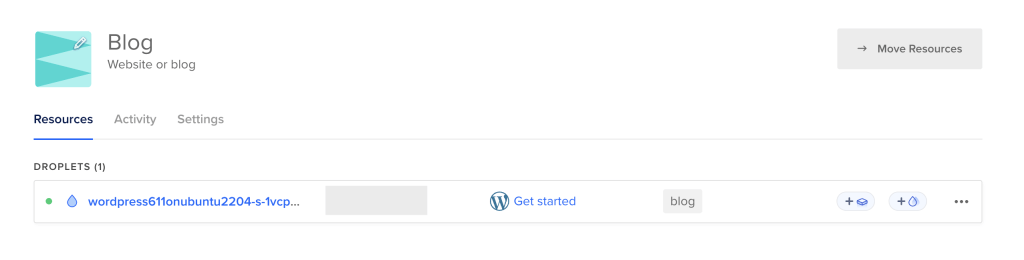
Go to your project page where you will see your newly created droplet with the droplet information including your droplet’s IP address and WordPress “Get Started” link. Click on this link and follow the detailed instructions on how to setup your droplet:
- Open your terminal (or use an SSH client like PuTTY on Windows).
- Type the following command:
ssh root@your_droplet_ip -i ~/.ssh/your_ssh_key_name - You’ll be connected to your droplet and prompted with the WordPress setup wizard. Follow the instructions.
Step 5: Secure Your Droplet
Even as a beginner or blogger, it’s essential to prioritize security. Follow these best practices to enhance your Droplet’s security:
- Create a new user with sudo privileges:
adduser your_username - Add the user to the sudo group:
usermod -aG sudo your_username - Disable root login: Open the SSH config file with
nano /etc/ssh/sshd_config, find the linePermitRootLogin yes, change it toPermitRootLogin no, and save the file. - While using root user copy ssh key from root to your user:
cp /root/.ssh/authorized_keys /home/USERNAME/.ssh - Give correct permissions:
chown -R USERNAME:USERNAME /home/USERNAME/.ssh/*andchmod -R 0600 /home/USERNAME/.ssh/* - Restart ssh service to take effect:
service ssh restart
At this point you have disabled the ability to login with the root user and created a safer approach using your ssh key to connect to your user account.
Step 6: Set Up WordPress
With the One-Click App, WordPress is already installed, simplifying the process for beginners and bloggers. Complete the setup through your web browser:
- Open your web browser and visit
[**http://your_droplet_ip](http://your_droplet_ip)** or through your domain. - Follow the WordPress installation wizard, setting up your admin credentials and blog details.
Step 7: Configure WordPress
After installing WordPress, optimize it for your blogging and creative projects:
- Install essential plugins for SEO, social media sharing, and spam protection.
- Choose a suitable theme that aligns with your blogging style and creative vision.
- Create important pages such as About Me, Contact, and Privacy Policy.
- Set permalinks to make your URLs more SEO-friendly and improve your blog’s search engine visibility.
- Regularly back up your website to safeguard your blog posts and creative work.
Conclusion
Hosting your WordPress website on DigitalOcean servers provides beginners and bloggers with the flexibility and performance needed for a successful online presence. By following this comprehensive guide and utilizing relevant SEO keywords, you can confidently set up your blog, connect with your audience, and share your creative ideas with the world. Remember to focus on your content, stay consistent, and engage with your readers to build a thriving blog. Happy blogging!